When you buy a new washer and dryer, the company you buy it from will often kindly come out and hook everything up for you. Unfortunately, that’s not always the case.
And what if you get a “new to you” washer and dryer from a friend or buy one second-hand? In that case, you’ll definitely have to take matters into your own hands. With that said, let’s take a closer look at how to install your new washer and dryer, as well as some excellent ideas on how to get rid of the old ones.
📖 Were you looking for our step-by-step guide to UN-installing your washer and dryer?
DIY Washer and Dryer Installation
**Click to auto-scroll by section
- Prep and clean out laundry room
- Be 100% certain the power is turned off
- Check the cords & hoses for proper fit
- Connect the washing machine
- Connect the dryer
- Double-check secureness of hoses and drainage
- Take extra precautions with gas dryers
- Test both appliances
- Getting rid of your old washer and dryer
Should I just pay for installation?
Sometimes when you purchase a new washer and dryer from a retailer, or even a scratch and dent option, you can sometimes still choose to pay extra for professional washer and dryer installation. If not, you can look around at what local handymen and women can offer you.
Getting a good deal on installation
Prices on installing large appliances like washers and dryers can be reasonable, especially if you shop around. Paying the cost to install a washer and dryer can save you a great deal of time and it offers a degree of protection against installation mishaps.
Installing washer dryer hookups
In the rare case that you don’t already have hookups for your washing machine, dryer, or both, you’re definitely going to need professional help with installing washer and dryer hookups. Washing machines and dryers both require that the installer has professional knowledge of plumbing and electricity. If this isn’t you, go ahead and call an expert.
Cost to install washer dryer hookups
Professional installation of washer dryer hookups can cost between $350 – $600 on average. If you live in an apartment or a rental home, you may be able to work out a deal with your property manager to reduce rent – or even cover the cost of installation completely.
Either way, you absolutely must ask for permission before making a permanent change, even though it is considered an upgrade, to a rented property.

Step-By-Step Guide to Installing a Washer and Dryer
If you install a washer and/or dryer yourself and you run into problems, such as damaging your plumbing or a water leak, then you’re the one to blame.
By comparison, when you opt for professional installation, the installers will address and fix any issues that arise when they hook up a washing machine or dryer.
With that said, installing your own washer and dryer is completely doable, especially with some advanced preparation. Let’s take a step-by-step look at what you need to do to install a washer and dryer yourself.
📖 Consult Your Manual: It’s always a good idea to consult your instruction manual for the exact installation steps. If your manual is missing, then see if you can download an e-manual online.
Step One: Prep and clean out laundry room
The first step is to make sure that your machines are on a flat surface. Otherwise, your washer will likely start to move when it is spinning.
In one of the more important steps of the process, you’ll also want to be very sure that all of the connections you plan to use are safe. For example, you should never use an extension cord. All connections should be within easy reach of your machines.
Step Two: Be 100% certain the power is turned off
Electricity is your friend, but it can also be a dangerous enemy. Before installing your washer and dryer, you need to be 100% certain that the power is off.
Locate the circuit in your breaker box that powers your washer and dryer hookups, and switch the circuit off. If you have a voltage meter, it’s good to test the outlets for residual power.
Otherwise, you can test the power by plugging something into the outlet and turning it on. If it doesn’t, you’re ready for the washer and dryer install.
Step Three: Check the cords & hoses for proper fit
Once you have made certain that your power is off, the next step is to determine what kind of power cord you have. Is your power cord a three-prong or four-prong power cord?
Often older homes use three-prong 220-volt receptacles, whereas newer homes often have 200-volt receptacles. Note that some dryers don’t come with power cords, meaning that you’ll have to plan to buy one separately!
Step Four: Connect the washing machine
You should have two flexible water lines that connect your appliance to the plumbing (hot and cold), as well as a drain hose and power cord that are attached to your washer.
Attach the water lines
First, connect the cold water line to your washing machine. Your machine should indicate the correct side for each, usually by labeling it “hot” or “cold”, or by using blue or red markings. Next, attach the cold water line to the cold water supply behind your washing machine.
Repeat this step for the hot water line. Once the water lines are connected, turn the water on by turning each knob counter-clockwise. If there are no leaks, nothing should happen when you turn the water on.
Install the drain hose
Next, extend the drain hose out from the washing machine and insert it as far as possible into the drain, which is usually found between the hot and cold water spigots.
Don’t have a drain system? You can run your drain hose into a utility sink, if you have one available. Otherwise, you may need to contact a plumber.
Plug ‘er in
Finally, plug the washing machine into the power source. Remember, since the power is currently off, nothing should happen yet.
Step Five: Connect the dryer
Your dryer needs a way to vent all the heat and humidity it produces, which is done by way of the dryer vent hose or duct.
Built-In Cuff Vent Hose: If your vent hose has a built-in cuff, you should be able to just slide it right into the circular void in the back of the dryer and attach it the same way to the vent. If you don’t have a vent hole in your laundry area, you’ll need to purchase an indoor dryer vent kit.
Full-Metal Duct Hose: If you have a metal vent duct, grab a flathead screwdriver to complete this step. Both sides of your dryer vent should have adjustable metal tension bands. Use your screwdriver to slowly loosen the tension band so you can easily slip the band and the duct over the vent hole in the back of your dryer. Once you have it on there, tighten it down as much as possible, being careful to not overtighten and bend the delicate metal.
Next, carefully extend the duct and attach it to the vent using the same technique. Make sure you only extend the duct enough to slide the dryer back toward the wall. If you extend it too much, you can easily crush the thin aluminum, which can cause highly flammable lint to build up over time.
Step Six: Double-check secureness of hoses and drainage
It’s always a good idea to double-check your work to be certain that you have attached all hoses properly. Everything should be secure, but not pinched or crushed. Never restrict water flow or airflow as this can damage your machines and create potential fire and health hazards.
Step Seven: Take extra precautions with gas dryers
In the event that you are using a gas dryer, you’ll want to get a professional involved. Gas is incredibly dangerous since it is flammable and sometimes even odorless. Your gas company may be able to help and should be contacted in advance of setting up your dryer.
Electric dryers are easier: While gas dryers are more efficient and cost-effective, if you do not currently have a gas dryer setup, then it will be easier to opt for an electric dryer.
Step Eight: Test both appliances
Once everything is hooked up, checked, and double-checked, you’re ready to test your work. Head on over to the circuit box and flip the breaker back on.
Testing a dryer is easy – if the appliance turns on and the vent hose/duct stays connect, you did it! Testing a washing machine, however, requires a little bit more.
You can make sure that you’ve hooked up the cold and hot water properly by simply turning it on and running a quick wash cycle.
Select the “COLD” temperature for your cycle. Cold water is inherently cheaper than hot water, and cold water is pretty much always cold, right out of the pipe, so you know it’s right.
If you have an older machine or a top-loader, you can just lift the lid and make sure the water is cold while it’s running into the drum. However, if you have a newer machine or a front loader, you’ll have to wait until the water is as full as possible, and then use your hand to gauge the temperature from the washer door.
Obviously, you can’t just open your front-loader mid-cycle! 😉

Getting rid of your old washer and dryer
Keep in mind that installing your new washer and dryer is only the beginning. Once your washer and dryer are installed, you’ll need to think about how to dispose of your old ones.
Family and friends may want your old washer and dryer
So now you have some old, heavy appliances sitting around. So, what should you do? You can ask and see if your friends or family need a washer or dryer or know someone who does.
While this can be a great way to get rid of a washer or dryer, the problem is that the appliances are heavy and will need to be transported. In short, transportation is often a huge hurdle in getting rid of old washers and dryers.
If you find an interested party who also has access to a truck and is good at moving heavy objects, then this will be an easy and effective path to get them out of your home.
Charities expect your washer and dryer to be in good condition
Donating your old washer and dryer can be a good option. Yet, it is important to note that your old machines must be in good condition. You may discover that your old washer and dryer aren’t as attractive to charities as you may have hoped.
Many charities will expect you to drop off the washer and dryer at their facility, which once again presents the problem of transportation.
Recycling companies may accept your machines
Next, you can turn to your local recycling company. In some cases, the company may take your old washer and dryer from the curbside, but this is by no means guaranteed, and this process requires you to somehow get the machines to the curb. Many recycling facilities will want you to deliver your old washer and dryer to them in person.

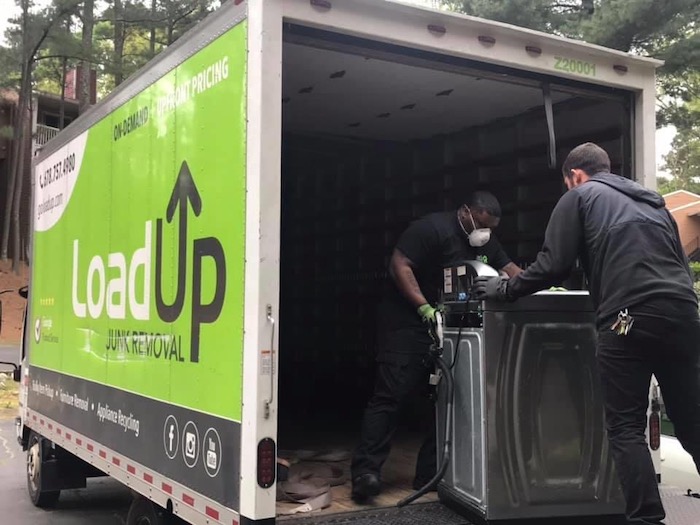
Convenient in-home appliance removal from LoadUp
Let’s face it, transporting heavy appliances such as washers and dryers can be a real hassle and even dangerous. LoadUp is the most efficient way to get rid of your old washer and dryer.
You won’t need to keep asking Google “who installs a washer and dryer near me?” Because at LoadUp, we do it all! We will disconnect and take your old washer and dryer directly from any location in your home, safely load it up, and carry it away so that it can be properly recycled.
In short, you don’t have to give your old washer and dryer a second thought when you work with LoadUp. You can focus on checking laundry off the to-do list with your new appliances.
Related Articles from the Trash Talk Blog:

